Over 1M Posts • 84K Topics • 9K Authors

Interior Replacement Bulbs/LEDS - 6G Celicas Forums

Topic #62867 21 posts Started by 3TST
I have hunted around the forum and found various articles about changing the interior lighting color but really can't find anything on the size of the replacement bulbs/led etc. kindasad.gif
I know a few people on the forum have done this so can you help me out please. bowdown.gif

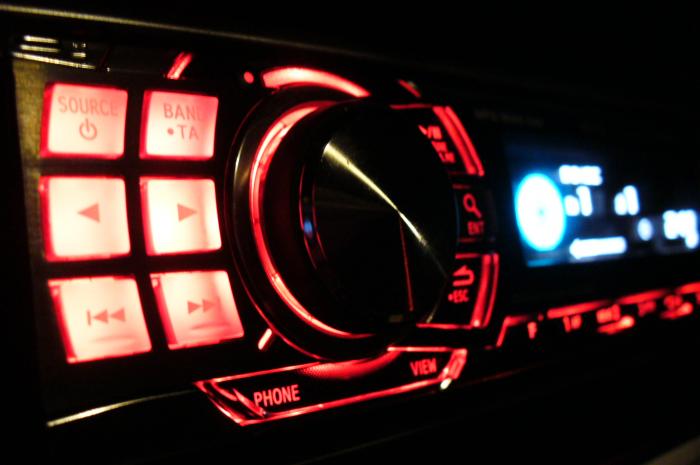
So I have started pulling things apart and found the following:

Heater Control Unit
- 2 screw/plug-in type - brown base (with green condoms on)
- 14 green (soldered to pcb)
- 2 orange (soldered to pcb)

Hazard Warning Button
- 1 screw/plug-in type - grey base

Ash Tray
- 1 Wedge type

Ignition Surround
- 1 Wedge type

Lighter Socket
- 1 screw/plug-in type - large grey base

Door Switch (window button)
- 1 green (soldered to pcb)

Problem is I have no idea what size bulbs/leds I need to replace them with.
Do I need resistors?
I've seen a couple of references to web sites selling leds and replacement bulbs BUT Does anyone have part numbers?
confused.gif
Thanks in advance.

This post has been edited by 3TST: Nov 2, 2008 - 6:00 AM
this website should help you with some of those bulbs (click me)

|Photoshoot|COTM: June 2011|My progress thread|Reputation|Old group buy|
Hi

I'm doing this conversion of all my dash lights to Blue.

This is what I know so Far

Heater Control Unit
- 2 screw/plug-in type - brown base (with green condoms on) - replace with:T5
- 14 green (soldered to pcb) - As far as I can see thers are 3mm LED's but will have to be removed and replaced
- 2 orange (soldered to pcb) - see above

Hazard Warning Button
- 1 screw/plug-in type - grey base

Ash Tray
- 1 Wedge type - Colored the lense in the ash tray

Ignition Surround
- 1 Wedge type - I replaced this with a Super Bright Blue LSD

Lighter Socket
- 1 screw/plug-in type - large grey base - I will be replacing this with a Super Bright LED

Door Switch (window button)
- 1 green (soldered to pcb) - This is a LED that will have to be replaced.


WWSideWinder

WWSideWinder - 1996 - 3S-FE - Auckland New Zealand~ signature made by jaws4god ~Have a look at my thread for updates on my progress."http://www.6gc.net/forums/index.php?showtopic=63338&hl=0"
Here's what, I think kindasad.gif , I've found out:

Heater Control Unit
- 2 screw/plug-in type - brown base (with green condoms on) >>REPLACE with NeoWedge NE04>>
- 14 green (soldered to pcb) >>REPLACE with 3mm component LED's - RL3-?5014>>
- 2 orange (soldered to pcb) >>REPLACE with 3mm component LED's - RL3-?5014>>

Hazard Warning Button
- 1 screw/plug-in type - grey base >>REPLACE with NeoWedge NE04>>

Ash Tray
- 1 Wedge type >>REPLACE with #74 T1-3/4 Wedge Instrument Panel Bulb with standard LED >>

Ignition Surround
- 1 Wedge type >>REPLACE with #74 T1-3/4 Wedge Instrument Panel Bulb with standard LED >>

Cigarette Lighter Socket
- 1 screw/plug-in type - large grey base >>??????? HELP REQUIRED>>

Door Switch (window button)
- 1 green (soldered to pcb) >>REPLACE with 3mm component LED's - RL3-??30>>

Is anyone able to confirm?
Oh well...no replies frown.gif
...and so many people have done this!

Just gone ahead an ordered @$40 worth of LEDs...some are bound to work kindasad.gif
I'm looking into this as well and this is what i've come up with.

Gauge cluster
194 x3
ignition ring
74 x1

Climate Control
194 x3
plus some leds soldered to the board
see this how to
http://www.6gc.net/forums/index.php?showtopic=61249

cig lighter
74 x1
window switch
some led soldered to board

Clock
removed the old plastic and replace it with whatever you need.

'99 Celica GT - Sold'11 Mazdaspeed3
There's also a light bulb in the ash tray - remove e-brake trim to get to it - type 74

Door lights for those who have it - 194

Map/dome lights - 1157 IIRC

This post has been edited by GriffGirl: Oct 28, 2008 - 6:30 PM
Thanks for the info.
If you're replacing standard bulbs (#501, #74, etc.) then it is fairly straight forward, that is, replace a #74 bulb with a #74 bulb in the colour you want.
What I'm doing is a little more complex than that...
I'm replacing the LEDs in the heater control unit and window switch.
These are 3mm component LEDs - however, you have different brightnesses and lumination angles.

I have placed an order with SuperBrightLEDs for:
#RL3-R5014 (Red 3mm component LEDs)
#NEOx-R 4mm NEO4-x (Red NeoWedge Instrument LED Bulbs)
#74-RHP (Red 74-xHP Wedge Base LED Bulbs)
Once I have everything done, I'll confirm the part numbers listed above.

I have also just ordered a professional desoldering station and soldering iron kit.
(Expensive but I'm of the philosophy that 'Never attempt a job until you have the right tools to do it!')
>
QUOTE (3TST @ Oct 30, 2008 - 7:52 AM) *
>Thanks for the info.
If you're replacing standard bulbs (#501, #74, etc.) then it is fairly straight forward, that is, replace a #74 bulb with a #74 bulb in the colour you want.
What I'm doing is a little more complex than that...
I'm replacing the LEDs in the heater control unit and window switch.
These are 3mm component LEDs - however, you have different brightnesses and lumination angles.

I have placed an order with SuperBrightLEDs for:
#RL3-R5014 (Red 3mm component LEDs)
#NEOx-R 4mm NEO4-x (Red NeoWedge Instrument LED Bulbs)
#74-RHP (Red 74-xHP Wedge Base LED Bulbs)
Once I have everything done, I'll confirm the part numbers listed above.

I have also just ordered a professional desoldering station and soldering iron kit.
(Expensive but I'm of the philosophy that 'Never attempt a job until you have the right tools to do it!')


hey man

have u replaces the bulbs smile.gif?
Im thinking about doing the same thing.
.

This post has been edited by Seztor: Nov 1, 2008 - 1:00 PM

[font=CELICA FOREVER][/font]
Ran in to a major of problem...the tools I had were not up to the job frown.gif
So I have bought myself a desoldering rework station and a soldering station....these arrived the other day.
Set myself up today and have just started.
Situation so far...
All the soldered LEDs on the control panel go through a black plastic tower.
Desoldering the single ones is ok as the black plastic tower comes away with the LED attached (just got to be careful you don't melt the black plastic tower locating pins).
The other LEDs are in a multi-black plastic tower - this is proving to be more difficult.
Going to get some tweezers or long nose pliers and try and desolder the LEDs and pull them through the black plastic tower.

Finished mine last night.

Use a ling nose pliers to pull the LED out sideways from the plastic holder and then desolder

kindo like this but in reverse

WWSideWinder - 1996 - 3S-FE - Auckland New Zealand~ signature made by jaws4god ~Have a look at my thread for updates on my progress."http://www.6gc.net/forums/index.php?showtopic=63338&hl=0"
>
QUOTE (GriffGirl @ Nov 20, 2008 - 1:05 PM) *
>It's hard to tell if those would work because I can't find anywhere that says what the size of the base is. These would work though:

http://www.v-leds.com/Shop/Control/fp/scat...um/1/menu_num/2

And the 1157s on this page will fit too
http://www.superbrightleds.com/cgi-bin/sto...i?product=OTHER

Griffy - did you want those bulbs I had or did you find what you were looking for in the 1157's?

ENGINE: '93 RC 3S-GTE/WRC CT-20b [18-20PSI]PERF: TRD/HKS/ARP/NGK/MSD/ACT/Blitz/STRI/APEX'i/TwosRus/GReddy/Magnaflo/KOYOSUSP: Tein/Bilstein/SusTech/INT: SS-III SEATS/Toyota Hyper SportsEXT: WRC/TRD/404QUOTE (lagos @ Aug 25, 2010 - 10:13 AM)Its a safety feature so that people like you don't end up killing themselves or everyone around them.Slow down Paul Walker.6GC Chat - Go there: [url="http://www.griffgirl.com/forum/chat/index.php[/url]
I did find some LEDs that interest me but I'm actually going to look locally first, because I love that kind of instant gratification. So it's still a maybe on the bulbs. Well... now that I think about it, yeah, I do kinda want them.
Hey every1, I´ve just finished with mine dashboard but results are not as expected so I´ll try to change diods to achieve better results.

I do have Alpine 9886R which has red buttons and white display and therefore I´d like to have everything as combination of these two colours.
Will use mine lighter as USB slot for memory cards because I´m non-smoker. I´ve changed three main bulbs on dashboard for LED´s (each worth approx. 1,5 $) and my friend make the change on heat control panel (including work 10 $). The heater for rear window has own diod and therefore it´s much more brighter than rest.

This is most probably not the final version because I´m not satisfied. At least I do know how to take into parts dash board. biggrin.gif


´95 T20 GT
only LEDs used to match color of my CD player smile.gif


No more replicas... This is evolution... This isSS-four:)________[Featured Celica of 6gc.net @ 2010]_________
Success smile.gif ...well a certain amount anyway. kindasad.gif
Finished soldering the LEDs in my heater control unit and I'm really pleased with the results
(apart from 3 that don't work) frown.gif - and I didn't get any spares rolleyes.gif
I left the 2 amber LEDs as is and replaced all the other 14 with red LEDs.
I replaced the 2 twist-lock bulbs with white superbright twist-lock bulbs.
The result is that it all matches up with my head unit.
Incredibly, more by luck than judgement, the white superbright twist-lock bulbs in combination with the clear plastic interior of the heater control unit gives off a slight pale blue/white light which matches the stereo perfectly.
I tried to take some pics but they came out cr*p because the flash kept going off.
I'll try and take some other pictures when I can and post here.
Which twist-lock bulbs did you use? I need these!