
Overview
Create custom headlight eyebrows for your Celica using either thermoformed plastic or vinyl decals. This aesthetic modification adds a distinctive JDM-inspired accent that frames your headlights and creates a more aggressive front-end appearance. Choose between two methods: heat-formed plastic for a permanent, three-dimensional look, or vinyl application for a simpler, removable option.
🕒 Time Required: 4 hours (plastic method)
💰 Cost: $20-40 (materials and paint)
🔧 Tools: Heat gun, cutting tools, template materials
Required Tools & Materials
🔧 Tools (Plastic Method)
- Sharp knife or electric jigsaw
- Heat gun or blow dryer
- Sandpaper (various grits)
- Cutting mat or safe surface
📦 Materials
- Plain plastic sheet (ABS or similar)
- Cardboard for templates
- Automotive paint or primer
- Strong double-sided adhesive tape
- Alternative: Vinyl decal material
Installation Steps - Plastic Method
Step 1: Create Template Design
Cut a piece of cardboard to the desired eyebrow shape. Consider the natural contour of your headlight housing and the overall aesthetic you want to achieve. The eyebrow should complement the headlight shape without obstructing light output. Test fit the cardboard template on one headlight to ensure proper proportions and positioning.
Step 2: Cut Plastic Pieces
Once satisfied with your cardboard template, trace it onto your plastic sheet twice to create matching left and right eyebrows. Use a sharp knife or electric jigsaw to carefully cut out both plastic pieces. Work slowly and follow your traced lines precisely for clean, professional edges.
Step 3: Initial Edge Finishing
After cutting, sand down all edges to remove sharp or rough areas. Start with medium-grit sandpaper and progress to finer grits for smooth, finished edges. This step is crucial for both safety and professional appearance - rough edges will be immediately noticeable once installed.
Step 4: Heat Forming Process
Heat the plastic pieces with a blow dryer or heat gun until they become soft and pliable. Work carefully to avoid overheating, which can cause warping or burning. Once heated, immediately place each piece on its corresponding headlight and carefully mold it to match the headlight's natural contour. Allow to cool completely while maintaining the desired shape.
Step 5: Test Fit and Refine
Test fit the cooled pieces on both headlights. If the contour isn't quite right, you can reheat and reshape as needed. Use sandpaper to make minor adjustments to the fit. The eyebrows should sit flush against the headlight housing without gaps or stress points that could cause cracking.
Step 6: Paint and Finish
Prepare the plastic surfaces for painting by cleaning thoroughly and applying primer if necessary. Paint the eyebrows to match your car's color scheme or create a contrasting accent. You can handle this step yourself or have a professional body shop do the work for color-matched results. Allow paint to cure completely before installation.
Step 7: Final Installation
Attach the finished eyebrows using strong double-sided adhesive tape rather than permanent glue. This method provides secure attachment while allowing for future removal if desired. Clean both the headlight surface and eyebrow mounting area thoroughly before application. Press firmly and allow adhesive to set before driving.
Alternative Method: Vinyl Application
For a simpler approach, use vinyl decal material instead of thermoformed plastic. Purchase automotive-grade vinyl in your desired color and cut out eyebrow shapes using scissors or a craft blade. Clean the headlight surface thoroughly, then apply the vinyl pieces directly to the headlights.
Vinyl Method Advantages: Quick installation, easily removable, wide color selection, lower cost, no heat forming required. Considerations: Less dimensional appearance, may fade over time, limited to flat or simple curved surfaces.
Expected Results
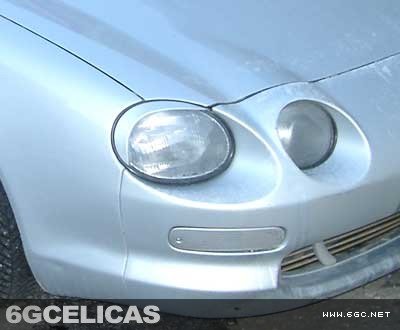
Completed headlight eyebrows provide a distinctive accent that frames your headlights and creates a more aggressive, custom appearance. The modification adds visual interest to the front end while maintaining functionality. Properly installed eyebrows should appear as a natural extension of the headlight housing design.
🔧 Versatility: Removable installation allows for future changes
💡 Lighting: No impact on headlight functionality when properly positioned
Additional Reference
Finished Installation
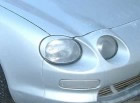
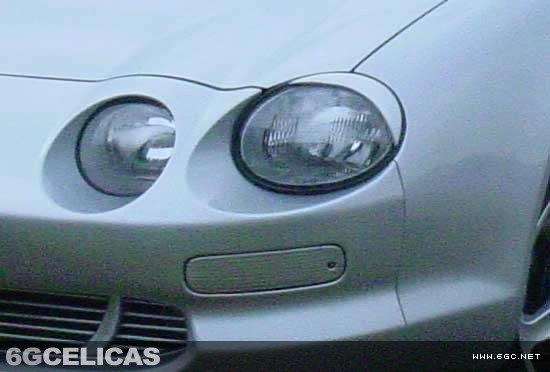
Detail View
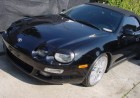
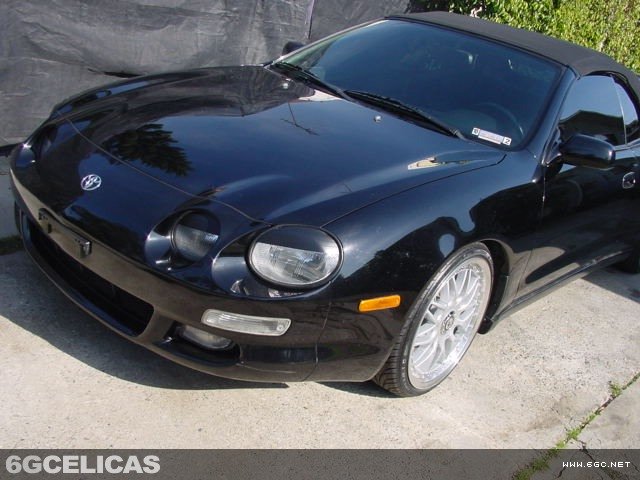
Alternative Style
💡 Pro Tips
- Template Testing: Make multiple cardboard templates to experiment with different shapes before cutting expensive plastic.
- Heat Control: Use lower heat settings and work gradually - overheated plastic can become brittle or develop stress marks.
- Paint Prep: Plastic requires proper primer adhesion promoter for paint durability, especially in harsh weather conditions.
- Symmetry Check: Measure and mark centerlines to ensure both eyebrows are positioned identically for balanced appearance.
- Removal Planning: Use high-quality automotive tape that bonds well but removes cleanly without residue.