
Complete Guide to 5S-FE Timing Belt Service
The timing belt replacement on a 5S-FE engine is a critical maintenance procedure that requires precision, patience, and the right tools. This comprehensive guide, originally created by azian_advanced from the 6GC community, walks you through every step of replacing the timing belt and optional water pump on your sixth generation Celica.
Important: This is a complex procedure that affects engine timing. If performed incorrectly, it can result in engine damage. Consider professional installation if you're not confident in your abilities.
⚠️ Important Disclaimer
I hold no responsibility for anything that breaks, any personal injuries, any damage to the vehicle, or any unexpected results caused by this how-to. This procedure involves working with heavy components and requires proper safety precautions.
- Always use proper jack stands and safety equipment
- Ensure engine is completely cool before starting
- Keep workspace clean and organized
- Double-check timing alignment before reassembly
🔧 Required Tools


Essential Tools (you absolutely NEED these):
- Full assortment of ratchets, sockets, and extensions
- Screwdrivers (flathead and Phillips)
- Combination wrenches
- Two hydraulic jacks
- Jack stands
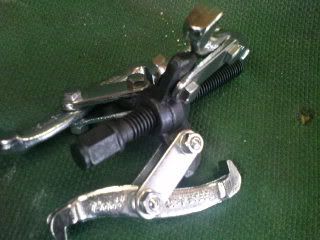
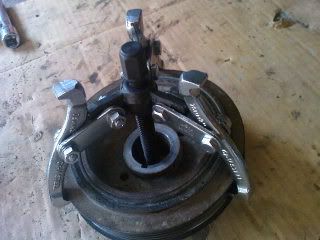
- Pulley puller
- Crowbar or breaker bar
- Marker (touch-up paint or correction fluid)
- Container for organizing nuts and bolts
- Determination and patience!
Optional but Helpful Tools:
- Set of pliers
- Short pick
- Hammer
- Liquid gasket maker
- Pipe extension for tight bolts
- Impact ratchets (speeds up bolt removal/installation)
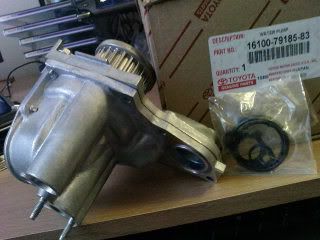
🔩 Parts to Order


Additional Reference: This guide is based on the official Toyota service manual procedures and community expertise from the 6GC forums.
Step-by-Step Procedure
Prepare the Vehicle
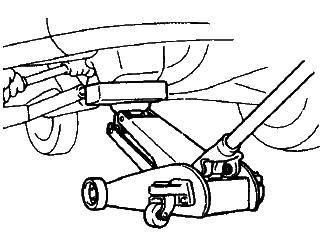
Put the car on jack stands. Don't lift too high, but ensure the hydraulic jack can reach the bottom of the engine oil pan. Make sure you have plenty of room to work around the vehicle.

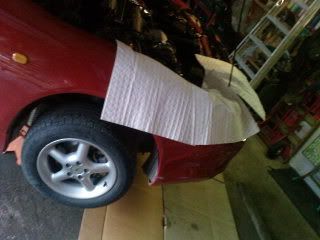
Protect the Paint
Place soft cloths or mechanic's pads around the engine bay to protect the paint when leaning over the engine compartment.

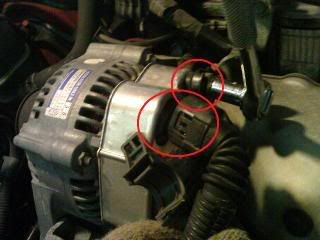
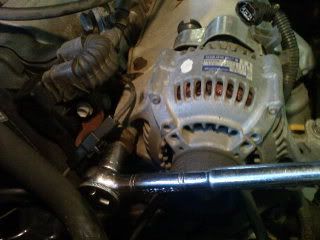
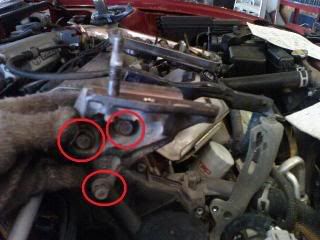
Remove Alternator
Disconnect the negative battery terminal. Remove the strut bar (14mm firewall bolts, 12mm strut mount bolts). Disconnect alternator harnesses. Loosen the rear 14mm pivot bolt and 12mm adjustment bolt. Remove the alternator belt, then remove the alternator completely.


Access the Engine
Remove the passenger side wheel and lower splash guard. If replacing the water pump, drain the coolant using the winged drain plug on the lower passenger side of the radiator. Ensure the engine is completely cool first!


Remove Engine Components
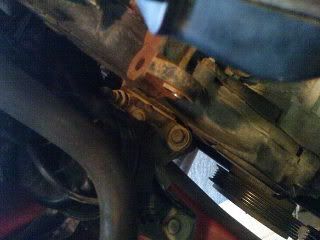
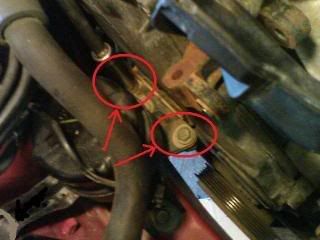
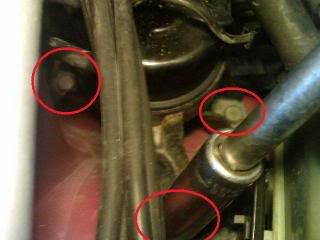
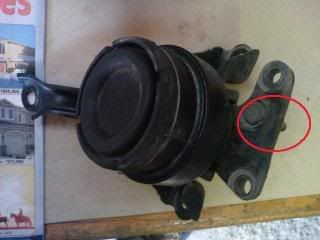
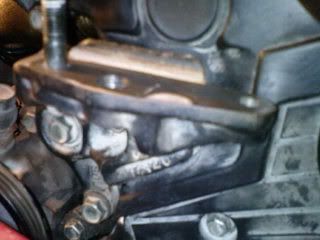
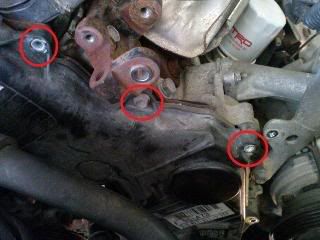
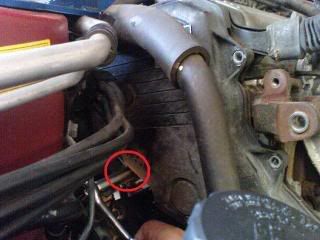
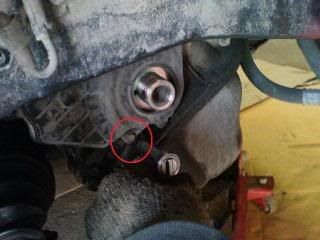
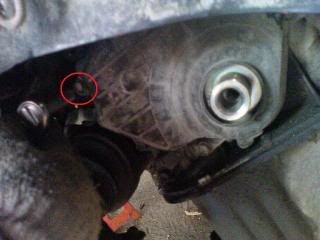
Remove the harness protector (two 10mm bolts). Place a jack under the engine oil pan for support. Remove the front motor mount bolt (17mm or 11/16"), passenger-side motor mount hardware (14mm nut, 12mm bolt), and lower engine bracket (three 14mm bolts).
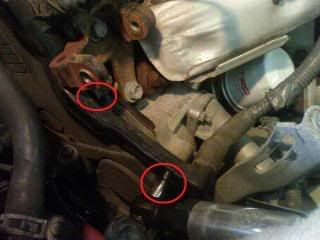
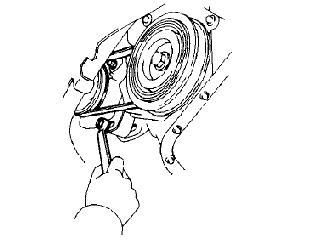
Remove Power Steering Belt
Loosen the two 14mm power steering bolts (pivot and adjustment), pull the pulley forward to loosen the belt, and remove it.
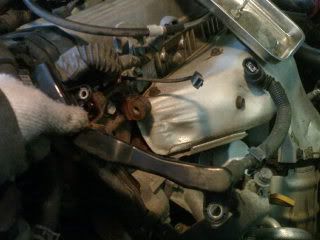
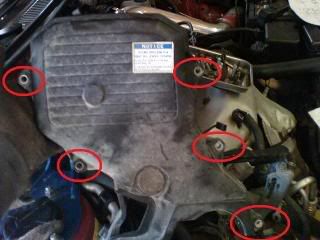
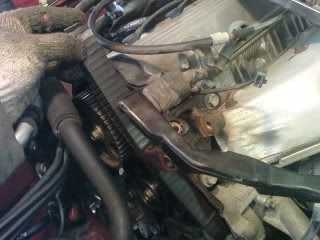
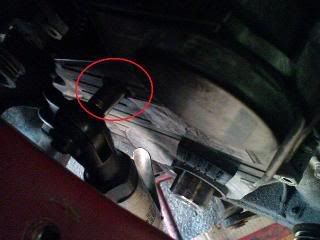
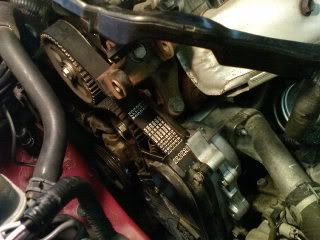
Remove Timing Belt Covers
Remove the upper timing belt cover (five 10mm bolts - three front, two rear). Ensure the rubber gasket stays with the cover.
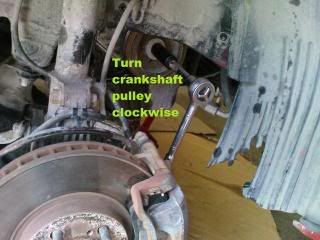
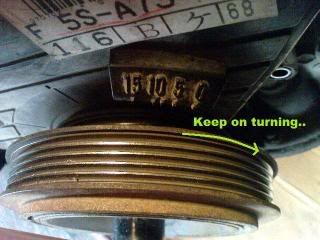
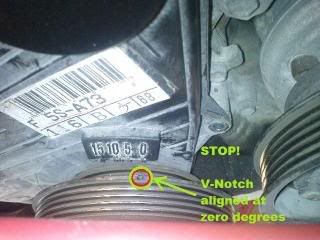
Set Timing to TDC
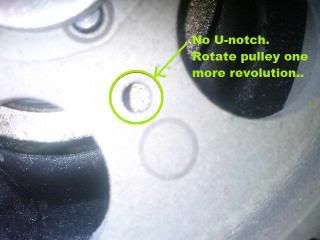
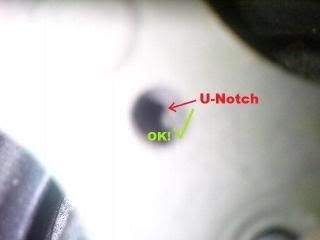
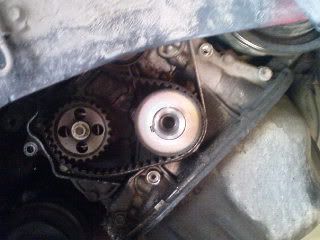
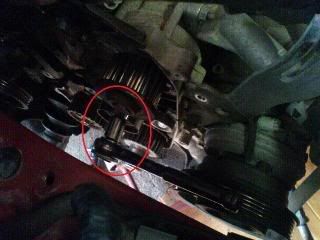
CRITICAL STEP: Use a 3/4" socket to turn the crankshaft pulley clockwise until the V-notch aligns with 0 degrees. Check that the U-notch on the cylinder head is visible through the hole in the camshaft timing pulley. This ensures #1 cylinder is at Top Dead Center (TDC).
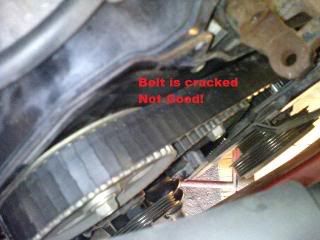
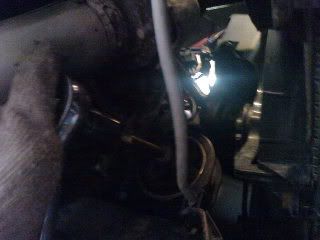
Remove Timing Belt
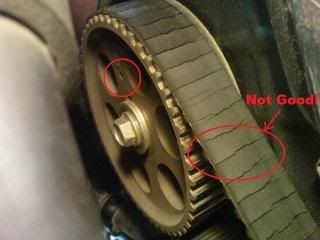
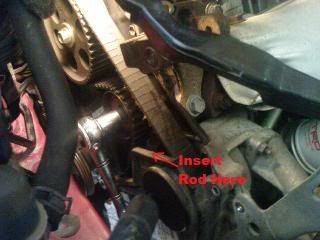
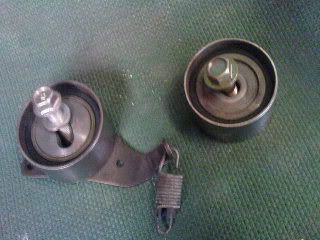
Loosen the tensioner pulley bolt, compress the tensioner spring with a socket extension, and retighten to relieve belt tension. Remove the belt from the camshaft timing pulley. Mark belt position if reusing!
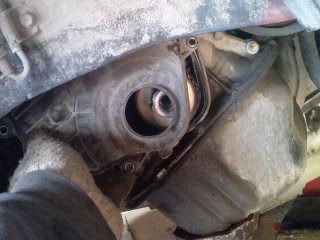
Remove Crankshaft Pulley
Find a bolt that fits the pulley holes, use it with a breaker bar to prevent rotation while removing the center bolt. Use a pulley puller to remove the crankshaft pulley. Mark the crankshaft position before removal!

Complete Timing Belt Removal
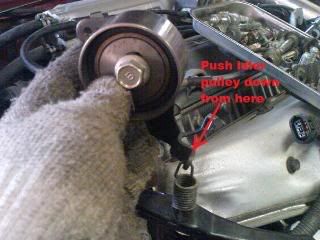
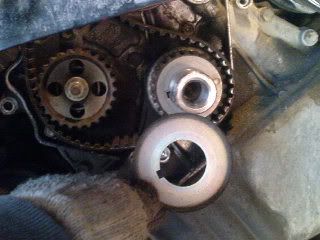
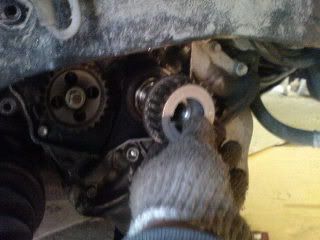
Remove the lower timing belt cover (four 10mm bolts), timing belt guide, remaining timing belt, and crankshaft timing pulley. Remove tensioner and idler pulleys (14mm bolts) and inspect them for wear.

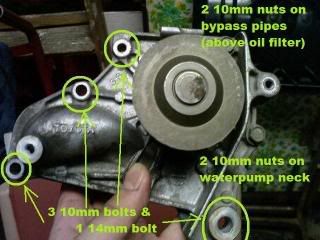
Water Pump Replacement (Optional)
If replacing the water pump: Remove the three 10mm and one 14mm bolts holding the water pump. Remove the water pump neck (two 10mm nuts) and bypass pipes (two 10mm nuts above oil filter). Install new pump with fresh gaskets. Don't overtighten aluminum housing!

Reassemble Lower Components
Clean all timing components thoroughly. Install tensioner and idler pulleys, crankshaft timing pulley, timing belt guide, lower timing belt cover, crankshaft pulley, and center bolt. Install timing belt on all pulleys except the camshaft pulley, keeping tensioner loose.
Set Final Timing
MOST DIFFICULT STEP: Install timing belt on camshaft pulley and apply proper tension. Reconnect battery and attempt to start engine. If timing is incorrect, you'll need to readjust the belt position one or two teeth at a time until the engine runs properly.
Final Reassembly
Once timing is correct, reassemble all components in reverse order. Install upper timing belt cover, power steering belt, alternator, motor mounts, splash guard, and wheel. Keep bolts organized!
Refill Coolant System
If you replaced the water pump, perform a complete coolant system flush. Use a coolant funnel to prevent air locks. Jack up front and rear to help air escape, then let the engine cool completely before final top-off.
🎉 Completion
Total Time Estimate:
- First-time DIY: 15-18 hours (including documentation and photos)
- Experienced mechanic: 5-7 hours
- Professional shop: 3-5 hours
After completion, you should have:
- Fresh timing belt properly timed
- New water pump (if replaced) with fresh coolant
- All engine components properly reassembled
- Engine running smoothly at proper idle
This guide represents knowledge shared by the 6GC community. Special thanks to azian_advanced for documenting this comprehensive procedure and sharing it with fellow Celica enthusiasts!
Related Resources
- USDM Engine Specifications - Learn more about the 5S-FE engine
- Forum Archive - Search for additional timing belt discussions